 |
CCP4 Molecular Graphics Tutorials |
 |
| Ligand Binding Site Selection |
Contents
Introduction
Simple menu-based selection
'Neighbourhood' to select active site residues
Picture wizard 'Broken ribbons' to show main chain atoms
Further Refinements
More complex selection tools using the selection language are described in the
Selection language tutorial.
Introduction
The representation of a model is built up from several model display objects. Each display object has three important properties: the atom selection, the display style (e.g. 'ribbons' or 'cylinders') and the colour scheme. This tutorial introduces some of the tools to control the atom seelction and is complementary to the Colouring tutorial. The Picture Wizard is a useful tool to set up complex pictures automatically but this tutorial shows you how to build up a picture from scratch.
Simple menu-based selection
This section creates a simple picture of ligand and protein ribbons using the basic tools on the display table.
 Load dUTPase with the Picture Wizard style set to All atoms from the Bonds folder.
 Create an additional model object by clicking on the model icon and selecting Add model display object.
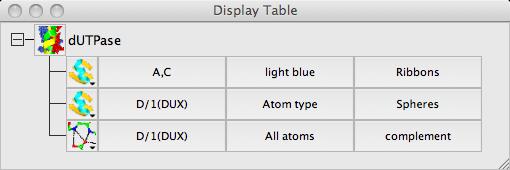
 Use the model display object selection menu (click on the button labeled All atoms to open the menu) to select the atoms for the two objects: the monomer //D/1(DUX) in one object and for the other object select from the of chains menu the two chains A and C.
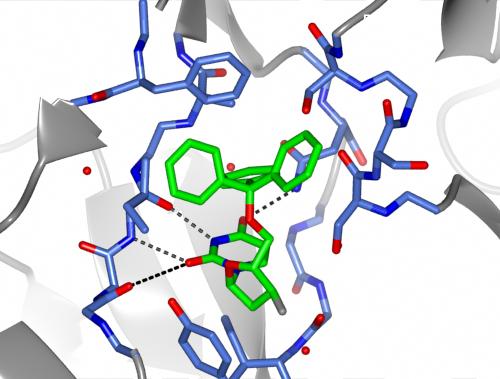
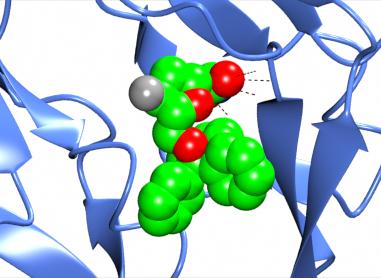
You can choose how to display and colour these objects but for example
 Also shown here are the hydrogen bonds between the ligand and the protein by selecting Add display object and Hydrogen bonds from the model icon menu and then limiting the display to hydrogen bonds between (selected from the atom seelction menu)) the monomer //D/1(DUX) and (selected from the second column of 'other' atom selection) All atoms.
'Neighbourhood' to select active site residues
This section adds the residues which form the ligand binding site to the picture. Create another model object for dUTPase and, from the selection menu, pick Selection browser.
The selection browser window consists of three frames. The top frame provides access to a variety of customised section tools, the middle frame is a tree view of the model chemical structure and the bottom frame is the text selection command. Initially the top frame does not show any selection tool but choose the neighbours option from the combobox on the top right of the window to see the neighbours tool at the top of the window:
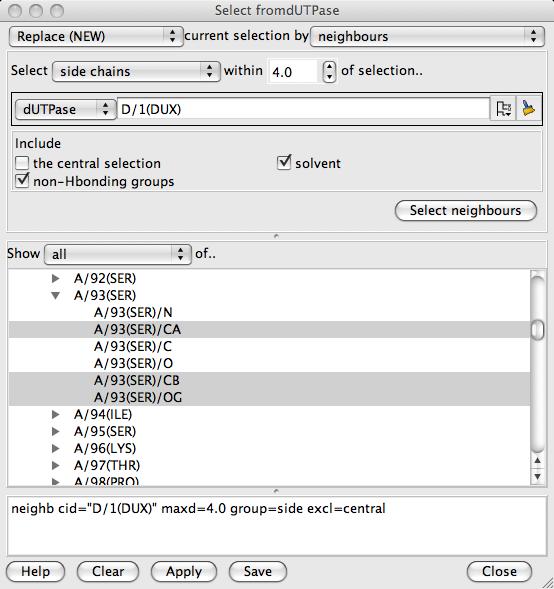
The neighbours tools will select atoms, residues, side chains or other groups within a given cutoff distance of a specified set of atoms such as a ligand. This serves as a good first guess at the relevant residues in a ligand binding site. To select the 'central' group click on the tree icon  to open a tree view and select D/1(DUX) from the monomers group. Click the Select neighbours button to apply this selection. In the graphics window you should see some residues displayed around the ligand - go to the display table to make the display style Cylinders. Back in the bottom frame of the Selection Browser the selection command neighb cid="D/1(DUX)" maxd=4.0 group=residue excl=central is shown. These selection commands can be edited or entered manually but usually you should should not need type in commands. In the middle frame of the Selection Browser window look at the tree view to see the selected residues are now highlighted (you may need to open branches and scroll down). You can click on the tree view to add or remove atoms or residues. Beware that if a higher level in the tree (e.g. a chain) is selected then all of the lower level items (e.g. residues) will be selected even if they are not highlighted.
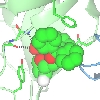
In the graphics window look at the picture of the binding site. The selection of residues around the ligand includes several side chains that are pointing away from the ligand and not really contributing to the binding site. Go back to the neighbours tool and change the Select residues to main/side chains and click the Select neighbours button again. The binding side display will be simplified to show only main chains or side chains close to the ligand rather than whole residues.
The fragments of main chain cylinders superposed over the ribbon still look a little odd. One way to improve this is to break the ribbon where you want to show the main chain atoms. The simplest way to do this is using the picture wizard to set up two objects: one for the ribbon and one for the main chain atoms. But first remove the main chain atoms from the neighbours selection by changing the main/side chains option to side chains and again clicking the Select neighbours button.
Picture wizard 'Broken ribbons' to show main chain atoms
From the model icon menu select Picture wizard. In the new window first uncheck the box labelled Delete any existing display objects otherwise the work so far will be lost. In list box at the top left of the new window open the Ribbons folder and click on the Broken ribbon neighbours option. In the options for this drawing style select a ligand D/1(DUX) and then click the Create picture button. Two new display objects are created - a broken ribbon and some main chain cylinders close to the ligand. These may be obscured by the previous ribbon object which can now be hiden or deleted by clicking the appropriate display object icon and selecting Hide or Delete from the menu.
Further Refinements
You can choose colour and display styles and change the drawing styles (such as cylinder or hydrogen bond width) via the Drawing style option on either the model or the HBonds icon menu. Almost certainly you should also add some labels as explained in the Text and Extra Images tutorial. use the Render option from the File pull-down menu to save the image.
A final image might look like this..