Contents
IntroductionChanging the 'standard' colour schemes
Creating a customised colouring scheme
Colouring Hints
 |
CCP4 Molecular Graphics Tutorials | |
| Atom Colouring |
| Documentation Contents | On-line Documentation | Tutorials | CCP4mg Home |
Complex pictures are built up from several display objects. The tools to select the atoms in a display object are introduced in the complementary Selection tutorial. All of the atoms in one display have the same display style (e.g. 'ribbons' or 'cylinders') and must obey the same colouring scheme rules. There are some standard colouring schemes such as 'atom type' and 'secondary structure' which you can customise as explained in the first example below. The second example shows how to create your own colouring scheme by selecting chains, residue ranges, residues or atoms to be specific colours.
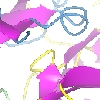
Load a model (for example try dUTPase from the tutorial data or a model of your choice) with the Picture Wizard style set to secondary structure from the ribbons folder.
The DUX ligand in dUTPase is currently coloured by the 'Atom type' colouring scheme. The ligand contains an atom of fluorine which is currently coloured grey. To give the fluorine atom a more distinctive colour open the Preferences window (from the Edit pull down menu) and select Atom type from the Model colours folder. To add a colour for fluorine click on the Add line button and in the new line at the bottom enter ' F' in the atom type column and choose a colour. Click Apply to see the effect.
Some colouring schemes depend on numerical values such as atomic temperature factor or charge. To look at one example change ribbon colouring to residue solvent accessibility by clicking on the colour scheme button in the display table and selecting Residue property and Residue solvent accessibility. The ribbon should be coloured various shades of blue, white and red denoting increasing solvent accessibility. In the Preferences window select Residue solvent access from the Model colours folder.
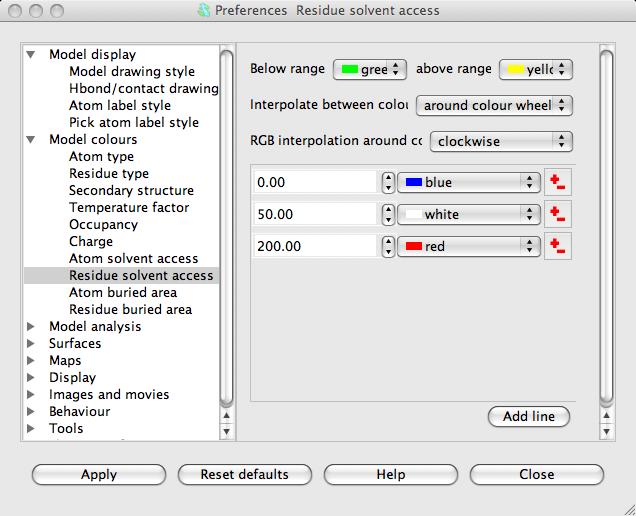
The default for this colour scheme has contrasting colours for any residue solvent accessibilities that are outside the usual range and then blends colours from blue to white and then from white to red for increasing accessibilities. To see how to set up an alternative colouring scheme try changing this to colour residues with accessibilities less than 20 white and greater than 20 red. To do this you need to delete one colour from the list by clicking on one of the edit icons  and selecting delete from the menu. The remaining two colour rules should be changed to:
value: 0.0 colour: white
value: 20.0 colour: red
Clicking the Apply button will colour the molecule in white and red with some pink blending. To remove the blending and get a clear cut-off at 20.0 change the combo-box labelled Interpolate between colours and change to no interpolation. Click the Apply button to see the model coloured in red and white.
The Model colours preferences change the standard colour schemes applied to all models.
This example shows how to set up a novel colouring scheme.
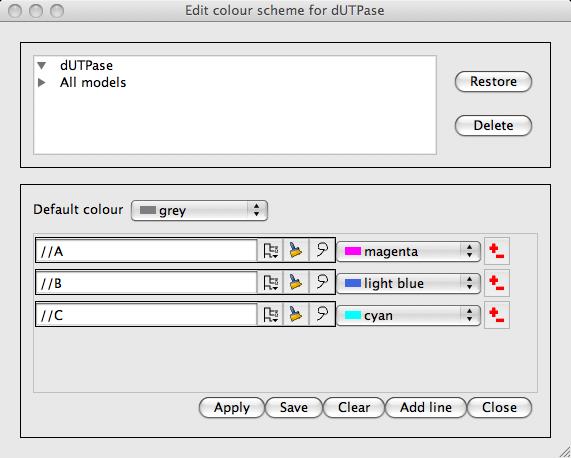
Change the colour scheme for the dUTPase ribbons to By chain by selecting this from the colour scheme menu on the display table. Then, from the same menu, pick Edit colour scheme... In lower half of the new window you can see the colour rules set up for the By chain scheme and you can now change or extend these rules. Each line has an atom selection widget to specify a set of atoms, a colour selection combo box and a edit icon which has a menu of tools to insert or delete lines.
It is possible to add new rules to the list by clicking on the Add line button or alternatively you can click on an atom in the ribbon display object with the right mouse button to open a popup menu that has an item Colour this. This has a submenu listing options: atoms, residues, start range, secondary structure and chain. Select one of these and a new line appears at the bottom of the colour rules with selection set and a default colour of red. Note that the Start range option does not immediately add line to the list; you must click on a second atom and select the Colour this ->Range from xxxxx option to complete selecting a range of residues. Try picking out the residues and secondary structure elements around one ligand binding site and giving then distinctive colours.
The colour selection combobox lists the 'standard colours', new colours can be defined using the Colour browser option at the bottom of the menu. In the new window click on the Create colours tab at the top of the window to change to a colour creation widget. To change the colour you can drag the cross-hair over the rainbow. Use the slider to the right of the rainbow to control the darkness of the colour. Click OK to save and aply the new colour. You may also need to click the Apply button in the Edit colour scheme window to see the effect on the model.
To save your colour scheme click on the Save button at the bottom of theEdit colour scheme window and in the new window enter a name for the colour scheme and click the Save button. The saved colour scheme should now be visible in the list at the top of the table. A saved colour scheme can be restored by double clicking on the list. In the Save window the default saving mode is for the dUTPase model only but the alternative All models option makes it universally available.