Contents
IntroductionThe Renderer
Command line (scriptable) rendering
Screenshots
Screenshot and Movie Preferences
 |
CCP4 Molecular Graphics Documentation | |
| Presentation Graphics |
| Documentation Contents | On-line Documentation | Tutorials | CCP4mg Home |
CCP4mg will output
The Render option on the File menu opens an interface
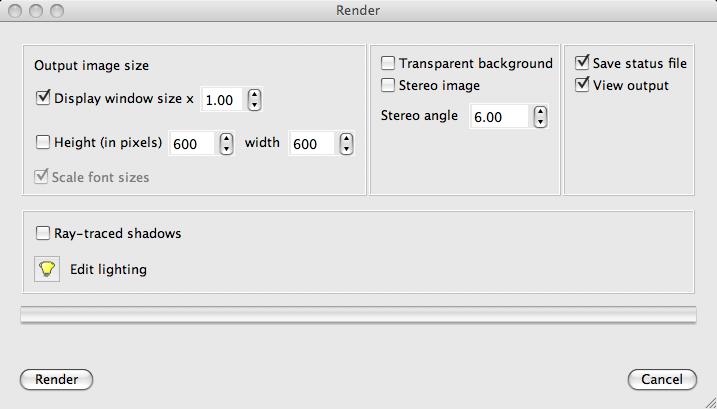
You can set the size of the output image, and choose to have a transparent background, stereo or raytracing. Note that for raytracing to be effective you will need to have a light source somewhere in front of the molecule so that shadows from elements of structure at the front of the model appear on elements of structure further back. There is a button to open the lighting gui which allows moving and changing the light sources.
When you click Render it may take a short while to create an image. You will be asked to enter the name of an image file (note that you can set the format of the output file) and the image which will be displayed in a viewer. The program status is also saved to a file with the same name as the output image file with the extension '.pkl'.
The two ways to see stereo images:
For cross-eye stereo cross your eyes so the two images appear on the top of each other (try watching a finger or pen move towards you from the screen to 10-15 cm from your eyes).
For wall-eye stereo (aka. divergent or wide-eye stereo) look through the image focusing on a distant point (try putting a sheet of paper from your nose to the screen).
Most people seem to prefer wall-eye stereo and most journals request wall-eye stereo pictures.
Starting with version 2.4.0 CCP4mg can render scenes as defined by the "Picture Definition" file format without needing to startup the main CCP4mg GUI. That is, the scenes my be rendered from the command line, on a server, as a utility for another program etc. A graphical display is not necessary for this.
The important arguments for running in this manner are:
The options command will look something like:
-RO '{"size":"640x480","smoothribbons":"1"}'
The options string must at minimum be '{}', i.e. curly brackets inside single quotes. Inside that is a comma-separated list of options. Each option name and value is specfied "name":"value". Both name and value are placed in double-quotes and they are separated by a colon.
Complete list of options:
All other style parameters, including drawing style, view description, lighting, etc. are specified in the input picture definition file.
A full command line might (on Linux) be something like:
ccp4mg -norestore -picture mypic.mgpic.py -R test.png -RO '{"size":"1600x1600","smoothribbons":"1", "raytrace":"1"}' -quit
or on Windows:
winccp4mg -norestore -picture mypic.mgpic.py -R test.png -RO '{"size":"1600x1600","smoothribbons":"1", "raytrace":"1"}' -quit
or on Mac:
/Applications/QtMG.app/Contents/ccp4mg-2.4.0/bin/ccp4mg -norestore -picture mypic.mgpic.py -R test.png -RO '{"size":"1600x1600","smoothribbons":"1", "raytrace":"1"}' -quit
A typical usage might be to load up a molecule interactively, set up view as required and then do File->Save status to file, changing file to "Editable picture definition file". One could then make several different copies of the generated file, changing only the file name (s) specified in the MolData section(s). One could then use a small shell script to render all the scenes. CCP4mg will be able to create and run such a script by itself in the future.
On might also consider changing the View section of the picture definition file to the following in automated workflows:
view = View (
     orientation = [1,0,0,0],
     centre_MolData = '1dfr',
     centre_selection = 'all',
     zoom = 0.8,
     )
This will centre the view on, for example the molecule 1dfr. This, of course, has to be a currently loaded molecule as specified in a MolData section. Future versions may contain the program authors' test scripts as examples.
See also detailed information about the entries in the picture definition file.
CCP4mg can now produce really nice pictures just by taking simple screenshots (File->Screenshot) which in most cases are comparable with the quality produced by "Render" (and can be better) and are produced much more quickly.
To produce high-quality screenshots it is necessary to make sure that shaders are turn on.
One thing which is particularly useful about the screenshot method is that pictures with "occlusion" can be produced in a few seconds, rather than the several hours "Render" might take.
The notes about high-resolution images for journals mention in the Render section above also apply to screenshots. In fact, low resolution images are not as well anti-aliased (smoothed) with screenshots compared to "Render" so making sure the resolution is high enough is more important for screenshots.
If you are zoomed in close on a small number of spheres, using the "Perfect spheres" drawing style will produce much nicer images.
Note that not all features required for high quality screenshots (shaders, ability to create pictures bigger than physical screen, ability to do shadows and occlusion) are available on all systems. This is due to graphics driver limitations. "Render" is available on all systems.
The screenshot preferences are in the Images and movies folder of the Preferences window (accessed from the Tools menu).
These Preferences apply to both saving the screen image as a screenshot and
saving images when making a movie.
Create image offscreen(offscreen buffer).The image can either be copied from the computer screen (note for computer nerds: it's actually using the backbuffer) or the image can be recreated in an offscreen buffer before it is saved to file. The disadvantages of simply taking the image from the the screen are
Using the offscreen buffer solves these two problems but may be noticeably slower; but it is the recommended option.
Smooth edges (anti-alias) output Smoothing the edges of ribbons, spheres and cylinders, i.e. anti-aliasing, is generally recommended to avoid them having a jagged appearance when viewed closely.
It is possible that for some combinations of hardware and operating system the offscreen buffer and/or anti-aliasing will not work and may need to be switched off. We would be interested to hear if you notice problems but may not be able to offer any better advice than: try the various alternatives and use the one that works.